Prototyping in MongoDB with the Aggregation Pipeline stage operator $sample
Prototyping in MongoDB with the Aggregation Pipeline stage operator $sample
The World Map as a visual example
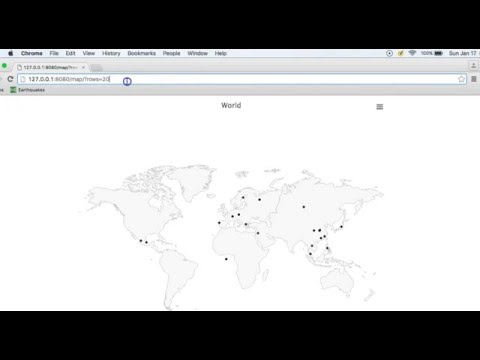
In order to show how the random sampling works in the mongoDB query, this NodeJS Express website will show the world map and display random latitude/longitude points on the map. Each refresh of the page will produce new random points. Below the map, the docs will display.Once the website is up and working with data points, we will play with the query to see how the data points change in response.
The demonstration video is available on YouTube.
Setup steps for the website
Setup
This article assumes you have no mongoDB, no website, and no data. It does assume you have an account on Compose. Each step is broken out and explained. If there is a step you already have, such as the mongoDB with latitude/longitude data or a website that displays it, skip to the next.- get website running, display map with no data
- setup the mongoDB+ ssl database
- get mock data including latitude and longitude
- insert the mock data into database
- update database data types
- verify world map displays data points
Play
When the website works and the world map displays data points, let's play with it to see how $sample impacts the results.- understand the $sample operator
- change the row count
- change the aggregation pipeline order
- prototype with $sample
System architecture
The data import script is /insert.js. It opens and inserts a json file into a mongoDB collection. It doesn't do any transformation.The data update script is /update.js. It updates the data to numeric and geojson types.
The server is a nodeJs Express website using the native MongoDB driver. The code uses the filesystem, url, and path libraries. This is a bare-bones express website. The /server/server.js file is the web server, with /server/query.js as the database layer. The server runs at http://127.0.0.1:8080/map/. This address is routed to /public/highmap/world.highmap.html. The data query will be made to http://127.0.0.1:8080/map/data/ from the client file /public/highmap/world.highmap.js.
The client files are in the /public directory. The main web file is /highmap/world.highmap.html. It uses jQuery as the javascript framework, and highmap as the mapping library which plots the points on the world map. The size of the map is controlled by the /public/highmap/world.highmap.css stylesheet for the map id.
Step 1: The NodeJS Express Website
In order to get the website up and going, you need to clone this repository, make sure nodeJS is installed, and install the dependency libraries found in the package.json file.
Todo: install dependencies
npm install
Once the dependencies are installed, you can start the web server.
Todo: start website
npm start
Todo: Request the website to see the world map. The map should display successfully with no data points.
http://127.0.0.1:8080/map/
Step 2: Setup the Compose MongoDB+ Deployment and Database
You can move on to the next section, if you have a mongoDB deployment with SSL to use, and have the following items:- deployment public SSL key in the /server/clientcertificate.pem file
- connection string for that deployment in /server/config.json
Todo: Create a new deployment on Compose for a MongoDB+ database with an SSL connection.

While still on the Compose backoffice, open the new deployment and copy the connection string.
Todo: Copy connection string
You will need the entire connection string in order to insert, update, and query the data. The connection string uses a user and password at the beginning and the database name at the end.

You also need to get the SSL Public key from the Compose Deployment Overview page. You will need to login with your Compose user password in order for the public key to show.

Todo: Save the entire SSL Public key to /server/clientcertificate.pem.
If you save it somewhere else, you need to change the mongodb.certificatefile setting in /server/config.json.
You will also need to create a user in the Deployment's database.

Todo: Create new database user and password. Once you create the user name and user password, edit the connection string for the user, password, and database name.
connection string format
mongodb://USER:PASSWORD@URL:PORT,URL2:PORT2/DATABASENAME?ssl=true
connection string example
mongodb://myname:myuser@aws-us-east-1-portal.2.dblayer.com:10907,aws-us-east-1-portal.3.dblayer.com:10962/mydatabase?ssl=true
Todo: Change the mongodb.url setting in the /server/config.json file to this new connection string.
{
    "mongodb": {
        "data": "/data/mockdata.json",
        "url": "mongodb://DBUSER:DBPASSWORD@aws-us-east-1-portal.2.dblayer.com:10907,aws-us-east-1-portal.3.dblayer.com:10962/DATABASE?ssl=true",
        "collection": "mockdata",
        "certificatefile": "/clientcertificate.pem",
        "sample": {
            "on": true,
            "size": 5,
            "index": 1
        }
    }
}
Step 3: The Prototype Data
If you already have latitude and longitude data, or want to use the mock file included at /data/mockdata.json, you can skip this step.Use Mockeroo to generate your data. This allows you to get data, including latitude and longitude quickly and easily. Make sure to add the latitude and longitude data in json format.

Make sure you have at least 1000 records for a good show of randomness and save the file as mockdata.json in the data subdirectory.
Todo: Create mock data and save to /data/mockdata.json.

Step 4: Insert the Mock Data into the mockdata Collection
The insert.js file converts the /data/mockdata.json file into the mockdata collection in the mongoDB database.Note: This script uses the native MongoDB driver and the filesystem node package. The Mongoose driver can also use the ssl connection and the $sample operator. If you are using any other driver, you will need to check for both ssl and $sample.
The configuration is kept in the /server/config.json file. Make sure it is correct for your mongoDB url, user, password, database name, collection name and mock data file location. The configuration is read in and stored in the privateconfig variable of the insert.js script.
The mongos section of the config variable is for the SSL mongoDB connection. You shouldn't need to change any values.
insert.js
var MongoClient = require('mongodb').MongoClient,
  fs = require('fs'),
  path = require('path');

var privateconfig = require(path.join(__dirname + '/config.json'));
var ca = [fs.readFileSync(path.join(__dirname + privateconfig.mongodb.certificatefile))];
var data = fs.readFileSync(path.join(__dirname + privateconfig.mongodb.data), 'utf8');
var json = JSON.parse(data);

MongoClient.connect(privateconfig.mongodb.url, {
    mongos: {
        ssl: true,
        sslValidate: true,
        sslCA: ca,
        poolSize: 1,
        reconnectTries: 1
    },
}, function (err, db) {
    if (err) {
        console.log(err);
    } else {
        console.log("connected");
        db.collection(privateconfig.mongodb.collection).insert(json, function (err, collection) {
            if (err) console.log((err));
            db.close();
            console.log('finished');
        });
    }
});
Todo: Run the insert script.
node insert.jsIf you create an SSL database but don't pass the certificate, you won't be able to connect to it. You will get a sockets closed error.
Once you run the script, make sure you can see the documents in the database's mockdata collection.

Step 5: Convert latitude and longitude from string to floats
The mock data's latitude and longitude are strings. Use the update.js file to convert the strings to floats as well as create the geojson values.update.js
var MongoClient = require('mongodb').MongoClient,
  fs = require('fs'),
  path = require('path');

var privateconfig = require(path.join(__dirname + '/config.json'));
var ca = [fs.readFileSync(path.join(__dirname + privateconfig.mongodb.certificatefile))];

MongoClient.connect(privateconfig.mongodb.url, {
    mongos: {
        ssl: true,
        sslValidate: true,
        sslCA: ca,
        poolSize: 1,
        reconnectTries: 1
    },
}, function (err, db) {
    if (err) console.log(err);
    if (db) console.log("connected");

    db.collection(privateconfig.mongodb.collection).find().each(function(err, doc) {
        if (doc){

            console.log(doc.latitude + "," + doc.longitude);

            var numericLat = parseFloat(doc.latitude);
            var numericLon = parseFloat(doc.longitude);

            doc.latitude = numericLat;
            doc.longitude = numericLon;
            doc.geojson= { location: { type: 'Point', coordinates : [numericLat, numericLon]}}; // convert field to string
            db.collection(privateconfig.mongodb.collection).save(doc);

        } else {
            db.close();
        }
    });
    console.log('finished');
});
Todo: Run the insert script
node update.jsOnce you run the script, make sure you can see the documents in the database's mockdata collection with the updated values.

Step 6: Verify world map displays points of latitude and longitude
Refresh the website several times. This should show different points each time. The variation of randomness should catch your eye. Is it widely random, or not as widely random as you would like?
Todo: Refresh several times
http://127.0.0.1:8080/map/?rows=5

The warning of the $sample behavior says the data may duplicate within a single query. On this map that would appear as less than the number of requested data points. Did you see that in your tests?
How $sample impacts the results
Now that the website works, let's play with it to see how $sample impacts the results.- understand the $sample code in /server/query.js
- change the row count
- change the aggregation pipeline order
- prototype with $sample
Step 1: Understand the $sample operator in /server/query.js
The $sample operator controls random sampling of the query in the aggregation pipeline.The pipeline used in this article is a series of array elements in the arrangeAggregationPipeline function in the /server/query.js file. The first array element is the $project section which controls what data to return.
arrangeAggregationPipeline()
var aggregationPipeItems = [
        { $project:
            {
                last: "$last_name",
                first: "$first_name",
                lat: "$latitude",
                lon:  "$longitude",
                Location: ["$latitude", "$longitude"],
                _id:0
            }
        },
        { $sort: {'last': 1}} // sort by last name
The next step in the pipeline is the sorting of the data by last name. If the pipeline runs this way (without $sample), all documents are returned and sorted by last name.
The location of $sample is controlled by the pos value in the url. If pos isn't set, the position defaults to 1. If it is set to 1 of the zero-based array, it will be applied between $project and $sort, at the second position. If the code runs as supplied, the set of data is randomized, documents are selected, then the rows are sorted. This would be meaningful in both that the data is random, and returned sorted.
Note: In order for random sampling to work, you must use it in connection with 'rows' in the query string.
We will play with the position in step 3.
Step 2: Change the row count
The count of rows is a parameter in the url to the server, when the data is requested. Change the url to indicate 10 rows returned.
Todo: request 10 rows, with sorting applied after
http://127.0.0.1:8080/map/?rows=10

Step 3: Change the aggregation pipeline order
The aggregation pipeline order is a parameter in the url to the server. You can control it with the 'pos' name/value pair. The following url is the same as Step 2 but the aggregation pipeline index is explicitly set.
Todo: request 10 rows, with sorting applied after
http://127.0.0.1:8080/map/?rows=10&pos=1
Note: Only 0, 1, and 2 are valid values

The results below the map should be sorted.

If the $sample position is moved to the 0 position, still before the sort is applied, the browser shows the same result.
Todo: request 10 rows, with sorting applied after
http://127.0.0.1:8080/map/?rows=10&pos=0
But, however, if the $sample is the last item (pos=2), the entire set is sorted, then 5 rows are selected. The results are no longer sorted.
Todo: request 10 rows, with sorting applied before
http://127.0.0.1:8080/map/?rows=10&pos=2


Note that while the documents are returned, they are not in sorted order.
If they are in sorted order, it isn't because they were sorted, but because the random pick happened that way on accident, not on purpose.
Step 4: Prototype with $sample
The mongoDB $sample operator is a great way to to try out a visual design without needing all the data. At the early stage of the design, a quick visual can give you an idea if you are on the right path.The map with data points works well for 5 or 10 points but what about 50 or 100?
Todo: request 500 rows
http://127.0.0.1:8080/map/?rows=500

The visual appeal and much of the meaning of the data is lost in the mess of the map. Change the size of the points on the map.
Todo: request 500 rows, with smaller points on the map using 'radius' name/value pair
http://127.0.0.1:8080/map/?rows=500&radius=2

Summary
The $sample aggregation pipeline operator in mongoDB is a great way to build a prototype testing with random data. Building the page so that the visual design is controlled by the query string works well for quick changes with immediate feedback.Enjoy the new $sample operator. Leave comments about how you have or would use it.