Sunday, June 26, 2011

How to create a ChildWindow Login Popup for Windows Phone 7

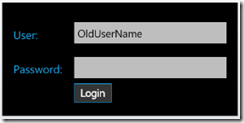
Introduction

After struggling with a navigation issue in my app of when to show/go to/return from the Settings page that captured the user name and password, I decided to pop up a window on any page where and when credentials were necessary but not currently known. Since I knew I was going to add more credential-requiring pages in my app, using a popup allowed me to reduce my dependency on navigation silliness between the pages, and have a more encapsulated design.


This post will show you how to pop up a ChildWindow on the app page to grab the user’s login credentials. The control allows the old username and password to be passed into the control so that previous values can appear. The tab order/enter key switches from textbox to textbox to button.


image


The sample application included in this post just displays the results on the calling page.


image

image

Acknowledgements

Several other posts helped me along the way:


Jesse Liberty’s video “Creating a custom popup in Window Phone 7” 

Shawn Wildermuth’s “Using ChildWindow in Windows Phone 7 Project

Raj Kumar’s “How to Implement ChildWindow in Windows Phone 7”

Coding4Fun Source code at Codeplex


ChildWindow Control Reference

The LoginChildWindow inherits from System.Windows.Controls.ChildWindow so you must add that as a reference. 


LoginChildWindow.xaml

   1:  <tk:ChildWindow x:Class="LoginChildWindow.LoginChildWindow"
   2:      xmlns="http://schemas.microsoft.com/winfx/2006/xaml/presentation"
   3:      xmlns:x="http://schemas.microsoft.com/winfx/2006/xaml"
   4:      xmlns:d="http://schemas.microsoft.com/expression/blend/2008"
   5:      xmlns:mc="http://schemas.openxmlformats.org/markup-compatibility/2006"
   6:      xmlns:tk="clr-namespace:System.Windows.Controls;assembly=System.Windows.Controls"
   7:      mc:Ignorable="d"
   8:                   VerticalAlignment="Top"
   9:                  HorizontalAlignment="Left"
  10:      Title="Login" 
  11:                  
  12:                  BorderBrush="Black"
  13:                  BorderThickness="2"                 
  14:      FontFamily="{StaticResource PhoneFontFamilyNormal}"
  15:      FontSize="{StaticResource PhoneFontSizeNormal}"
  16:      Foreground="{StaticResource PhoneAccentBrush}"                
  17:      d:DesignHeight="256" d:DesignWidth="480"
  18:      HasCloseButton="false">
  19:   
  20:      <Grid x:Name="LayoutRoot" Height="202" Background="{StaticResource PhoneBackgroundBrush}">
  21:          <TextBlock HorizontalAlignment="Left" TextWrapping="Wrap" Text="User: " VerticalAlignment="Top" Margin="20,43,0,0"/>
  22:          <TextBlock HorizontalAlignment="Left" TextWrapping="Wrap" Text="Password: " VerticalAlignment="Top" Margin="20,104,0,0"/>
  23:          <TextBox x:Name="txtUserId" VerticalAlignment="Top" Margin="117,23,8,0" Height="62" FontSize="18.667" TabIndex="1"  KeyUp="txtUserId_KeyUp"/>
  24:          <PasswordBox x:Name="txtPassword"  VerticalAlignment="Top" Margin="117,85,8,0" Height="62" FontSize="18.667"   TabIndex="2" KeyUp="txtPassword_KeyUp"  MouseLeftButtonUp="txtPassword_MouseLeftButtonUp"/>
  25:          
  26:          <Button x:Name="btnLogin" Content="Login" Margin="117,132,214,0" d:LayoutOverrides="Width" Click="btnLogin_Click" FontSize="18.667" BorderBrush="{StaticResource PhoneAccentBrush}" BorderThickness="1" Foreground="{StaticResource PhoneForegroundBrush}" Background="{StaticResource PhoneInactiveBrush}" Height="58" VerticalAlignment="Top" FontFamily="Tahoma" TabIndex="3" />
  27:          <!--<Button x:Name="btnCancel" Content="Cancel" HorizontalAlignment="Left" Margin="232,132,0,0" VerticalAlignment="Top" FontSize="18.667" BorderBrush="{StaticResource PhoneAccentBrush}" BorderThickness="1" Foreground="{StaticResource PhoneForegroundBrush}" Background="{StaticResource PhoneInactiveBrush}" Height="58" FontFamily="Tahoma" Click="btnCancel_Click" />-->
  28:      </Grid>
  29:  </tk:ChildWindow>
 

VerticalAlignment and HorizontalAlignment are set so that the window appears at the top of the screen. Without them, on my HD7, the on-screen keyboard overlays the child window and the user plays a game of tapping the control then the keyboard to get to the right place. I used system fonts so that the control will work with the phone’s current settings. If your app uses custom settings, you will need to change these. The cancel button, which is usually next to the login button, has been commented out on purpose. In my app, the login credentials are vital and canceling makes no sense. The user can always back button or start button away from the app, if they choose. The child window’s upper right corner cancel (icon of small x) is also removed via HasCloseButton="false" for the same reason.


LoginChildWindow.xaml.cs


   1:  using System;
   2:  using System.Collections.Generic;
   3:  using System.Linq;
   4:  using System.Net;
   5:  using System.Windows;
   6:  using System.Windows.Controls;
   7:  using System.Windows.Documents;
   8:  using System.Windows.Input;
   9:  using System.Windows.Media;
  10:  using System.Windows.Media.Animation;
  11:  using System.Windows.Shapes;
  12:   
  13:  namespace LoginChildWindow
  14:  {
  15:      public partial class LoginChildWindow : ChildWindow
  16:      {
  17:          public string Login { get; set; }
  18:          public string Password { get; set; }
  19:   
  20:          public LoginChildWindow()
  21:          {
  22:              InitializeComponent();
  23:          }
  24:          protected override void OnOpened()
  25:          {
  26:              base.OnOpened();
  27:   
  28:              this.txtUserId.Text = this.Login;
  29:          }
  30:          private void btnLogin_Click(object sender, RoutedEventArgs e)
  31:          {
  32:              // test values
  33:              if ((txtUserId.Text == null) || (txtPassword.Password == null))
  34:              {
  35:                  MessageBox.Show("WP7: Username & Password must be filled in before logging on.");
  36:                  //this.DialogResult = false;
  37:              }
  38:              if ((txtUserId.Text.Trim() == string.Empty) || (txtPassword.Password.Trim() == string.Empty))
  39:              {
  40:                  MessageBox.Show("WP7: Username & Password must be filled in before logging on.");
  41:                  //this.DialogResult = false;
  42:              }
  43:              else if (txtUserId.Text.Trim().Length < 2)
  44:              {
  45:                  MessageBox.Show("WP7: Invalid username or password. Be sure to use the WAZUp website login, not the Windows Azure login.");
  46:                  //this.DialogResult = false;
  47:              }
  48:              else
  49:              {
  50:                  // values are good so close this childwindow
  51:                  this.Login = this.txtUserId.Text.Trim();
  52:                  this.Password = this.txtPassword.Password.Trim();
  53:                  this.DialogResult = true;
  54:              }
  55:          }
  56:          //private void btnCancel_Click(object sender, RoutedEventArgs e)
  57:          //{
  58:          //    this.DialogResult = false;
  59:          //}
  60:          private void txtUserId_KeyUp(object sender, KeyEventArgs e)
  61:          {
  62:              if (e.Key == Key.Enter)
  63:              {
  64:                  if (txtPassword.Password.Length == 0)
  65:                  {
  66:                      txtPassword.Focus();
  67:                  }
  68:                  else
  69:                  {
  70:                      btnLogin_Click(sender, e);
  71:                  }
  72:              }
  73:          }
  74:          private void txtPassword_KeyUp(object sender, KeyEventArgs e)
  75:          {
  76:              if (e.Key == Key.Enter)
  77:              {
  78:                  btnLogin_Click(sender, e);
  79:              }
  80:          }
  81:          private void txtPassword_MouseLeftButtonUp(object sender, MouseButtonEventArgs e)
  82:          {
  83:              btnLogin_Click(sender, e);
  84:   
  85:          }
  86:      }
  87:  }


The validation routines are shallow. Please use them as a starting point for your own app requirements. The KeyUp and Mouse events are to make sure the enter button moves the cursor to the next logical place in the child window. It just saves the customer a step.


Main Page’s calling code

   1:  using System;
   2:  using System.Net;
   3:  using System.Windows;
   4:  using System.Windows.Input;
   5:  using Microsoft.Phone.Controls;
   6:   
   7:  namespace LoginChildWindow
   8:  {
   9:      public partial class MainPage : PhoneApplicationPage
  10:      {
  11:          public string Username { get; set; }
  12:          public string Password { get; set; }
  13:   
  14:          // Constructor
  15:          public MainPage()
  16:          {
  17:              Username = "OldUserName";
  18:              InitializeComponent();
  19:              this.txtBlockUsername.Text = Username;
  20:          }
  21:   
  22:          private void button1_Click(object sender, RoutedEventArgs e)
  23:          {
  24:              LoginChildWindow loginWindow = new LoginChildWindow();
  25:              loginWindow.Login = Username;
  26:              loginWindow.Closed += new EventHandler(OnLoginChildWindowShow);
  27:              
  28:              loginWindow.Show();
  29:          }
  30:          private void OnLoginChildWindowShow(object sender, EventArgs e)
  31:          {
  32:              LoginChildWindow loginChildWindow = sender as LoginChildWindow;
  33:   
  34:              if (loginChildWindow.DialogResult == true)
  35:              {
  36:                  this.txtBlockUsername.Text = loginChildWindow.Login;
  37:                  this.txtBlockPassword.Text = loginChildWindow.Password;
  38:                  //;
  39:              }
  40:          }
  41:      }
  42:  }


Caution: While I have included my version of System.Windows.Controls.dll in the app download, please use your own. I’ve grabbed several in the last six months from various locations and I don’t know if mine is the right one.

Looking for More Advanced Concepts for Pop ups?

This is a very simple example of a pop up both in design and usage. If you want a bigger, better, meatier answer, go over to the Coding4Fun project at Codeplex and grab the source code. This toolkit has some great ideas for pop ups.


Make sure to unblock the dependency dlls, build the solution, then debug the test project. Set break points in /Samples/Prompts.xaml.cs file.


Grab the Code for this Blog Post

Download Visual Studio 2010 Project (zipped)

Wednesday, June 15, 2011

How to Get and Install an SSL Certificate for a Windows Azure Deployment (Web Service) used by Windows Phone 7

Introduction

In all development processes, you need to perform a security review in order to responsibly handle your user’s data . With my Windows Phone 7 application, the process turned into a huge decision and many incremental steps to handle. This blog post will enumerate how I took my unsecured WP7 app and corresponding Windows Azure website and secured them. This blog includes a detailed step-by-step of deploying a SSL certificate on Windows Azure.

Process Summary

  1. DNS Name Change: Mapped my subdomain (wazup.berryintl.com) to my Windows Azure subdomain (*.cloudapp.net) via a CName change to my DNS on Network Solutions.
  2. Cert Provider: Found an SSL Cert provider.
  3. Dev Box/IIS: Created the certificate request in the IIS Manager.
  4. Cert Provider: Since I was requesting a wildcard certificate to handle all subdomains as well, I received two files: one for the domain and one to handle the wildcard subdomains.
  5. Dev Box/Certificate Manager: The next part of the process involved added these two files to my local Certificate Manager and exporting a single file (*.pfx) that Windows Azure could read.
  6. Windows Azure: Uploaded the certificate to Windows Azure on the Hosted Service in the Certificates node. Once that was done, I grabbed the corresponding Thumbprint GUID.
  7. Dev Box/Visual Studio Azure Web Project: Added the certificate and an HTTPS endpoint to the project.
  8. Dev Box/Code Changes: Changed the web service to answer HTTPS calls only and changed the Windows Phone 7 app to call the web service with an HTTPS request.
  9. Dev Box/Visual Studio Azure Web Project: Created package.
  10. Windows Azure: Uploaded new package for testing.

A Note about Best Practices

While I agree best practices should always be followed, for this blog post I’m ignoring them.

Clear text

During the in-house beta for my app, I stored username and password in Isolated Storage. These were passed to my web service (hosted on Windows Azure) as clear text. While both practices were convenient for me as a developer, they presented a problem when I got to the security design review.

Security Design Review

During the final security design review for the 1.0 release, I realized through research, that isolated storage on the Windows Phone 7 wasn’t a secure environment for passwords. As a result, I decided to store the username on the phone as it was but not store the password. This means the customer has to enter the password every time. This might be an annoying step but considered the data being secured (Windows Azure deployment information), the need for security outweighed the risk.

Now that I didn’t have a security weakness in handling username and password on the phone, I realized that I was transmitting the data as clear text. The fear is that someone could perform a man-in-the-middle attack and the password would be compromised in transmission. So I purchased an SSL cert for the web service so that the conversation between the phone and the web service was completely private. Because of the number of steps involved, I wanted to detail the second step below.

Edit Network Solutions DNS CName for Domain To Azure Name

The first thing I needed to do was add a NAME to my DNS to translate between my marketing URL (wazup.berryintl.com) and it’s hosted location on Windows Azure (*.cloudapp.net). Because you purchase an SSL certificate for a specific domain name which you must own, and Microsoft owns the cloudapp.netdomain, I needed to host the site on a domain that I own.

image

Windows Phone 7 Cert Providers – GoDaddy.com

Next, I needed to know where to go for an SSL certificate. After finding the list of SSL Root Certificates for Windows Phone, I picked GoDaddy.com since they are the cheapest and were running an even cheaper deal at the time. The User Interface for SSL certificates on GoDaddy.com is so terrible that I thought it was a scam. But after one call to a very polite and knowledgeable support guy, I realized I could get a certificate there for a web site that was hosted on Azure for a domain name I didn’t purchase via GoDaddy.com.

image

Generate the CSR file for Dev Box

The next step is to generate the CSR file from my dev box. I had to install IIS on my dev box in order to this. Then I followed these instructions for generating my CSR for IIS 7.

image
image

I don’t do this very often so I tripped up on the STATE abbreviation. Make sure you type out your state. Don’t abbreviate! I also had to look up how to enter a wildcard domain name but found this helpful page. The WildCard SSL certificate allowed me to secure both the main domain name (berryintl.com) and all subdomains. You can use this CSR Decoder to make sure you did everything right.

Go back To GoDaddy.com to process CSR

With the CSR file, I went back to GoDaddy to process my request.

image

image

Once the CSR file validated, I had to wait for my company IT boss to receive an approval request email from GoDaddy. All he had to do was click on the link (or something relatively easy). Then I could download the certificate from GoDaddy for IIS 7. The download included two files since I’m doing a wildcard cert: one was for the domain name (berryintl.com) and the second file was for the intermediates.

image

image

Local Machine Certificate Manager

For this step, I read these detailed instructions: Installing Your SSL On Microsoft IIS 7 . The point of this step is two-fold. I need to take the files that GoDaddy gave me and 1) turn them into something IIS 7 & Visual Studio 2010 understand for my local box and 2) put on Windows Azure for my web service deployment.

At the command line, I typed MMC (opening the console), added the Certificates snap-in, selected Computer Account, then Local Computer.


image
image

The two nodes I needed are Personal and Intermediate Certification Authorities. Starting with the Intermediate Certification Authorities. in the Certificates subdirectory, I imported the intermediates file.

image

In the Personal/Certificates, I imported the berryintl.com file.

image

Complete Certificate Request

Go back to IIS, and in the Actions panel, select Complete Certificate Request. You need to select the main certificate file and a friendly name.

clip_image001

Once the certificate process is complete, the cert should show up in the server certificates list.

clip_image002

Export Certificate *.PFC via MMC Certificate Manager with Private Key

Back in the Certificate Manager, select the domain name under Personal | Certificates. Right-click and choose Tasks | Export.

clip_image002[4]

Choose to export the private key. This means the certificate can’t be installed without the password that created the certificate file (*.pfx).

image

In the next set of options, choose to include all certificates in the certification path if possible, and export the extended properties. This will handle the wildcard subdomains.

image

Windows Azure Certificate

The next step is to get the certificate from the dev box up to Windows Azure. Logon to Windows Azure, and select the hosted service you want to add the certificates to. The SSL certs are kept in a separate location from Management Certificates so make sure you don’t select Management Certificates. Select the Certificates node under the hosted service. It should be empty. On the top tool bar, select Add Certificate.

image
Select the *.pfx file and password from the last step. Once the certificate is loaded on Windows Azure, select the main domain certificate and copy the Thumprint GUID. You will need that for your Visual Studio project.

image

image

Visual Studio WebRole

Open the Visual Studio Solution that has the Windows Azure web role. In the Solution Explorer, select the [Name].WebRole node under the Windows Azure Project node. Right click and select Properties.

image
On the Certificates tab, select Add Certificate. Enter the name, store location (Current User), store (My), and the thumbprint from Azure. These correspond to the location in the Certificate Manager on the local box.

image
On the Endpoints tab, select Add Endpoint. Make sure to set the protocol of https, port of 443, and SSL certificate name to your certificate name.

image
This change is saved in the ServiceConfiguration.cscfg and ServiceDefinition.csdef files under the Windows Azure Project node.

Change Server REST code

Next you need to change your REST web service methods to reflect that they can only be used via SSL. You do this by adding the [RequireHttps] attribute above the Method Definition. Build and test (but don’t package/deploy your web service).

Change WP7 App calling Code

Change all client calls to your REST API on Windows Azure to use https instead of http. Build and test.

*Check in to Source Control

Make sure to check in the two files from GoDaddy, the *.pfx file from the Certificate Manager, and a text file containing the password used with the *.pfx file. Also check in the Windows Azure Service Definition files in the Azure Project node, the REST Method code files, and the WP7 app code files.

[*Granted storing the certificate and the password in the same place creates a security risk. At this point, I think you understand they are dependent on each other and one is useless without the other. Please follow your own organization’s guidelines for securing such files.]

Package & Deploy to Azure

This next step turns off your production deployment for a small period of time. Make sure to do this at your lowest customer usage time.

Since you are changing the endpoint count from 1 (http) to 2 (http and https), Azure won’t let you use the Swap Vips feature. At this point, you need to stop and delete the staging deployment on Azure. Then publish (via Visual Studio) and upload your new version of your web service to Azure. If you have a deployment in staging (new with 2 end points) and production (old with one end point), you need to delete the production deployment, then promote the new deployment from staging to production.
Test your live production deployment.

If your Windows Phone 7 app is already in the Marketplace, but isn’t using the HTTPS web service calls, make sure you submit the new app and get it approved/released to the Marketplace before promoting the new HTTPS web service deployment.

Friday, June 10, 2011

How a technical conference should be / representing data

This last week I attended “Information Making Sense of the Deluge” hosted by The Economist (on my own dime and time).


First, this was the best conference that I have attended in at least 20 years…

  • They had a strict “No Death by PowerPoint” policy.
  • Less than 300 participants and 60 speakers.
  • Talks and panel discussions were typically just 10 – 20 minutes each.
  • A massive number of awesome speakers.

Since we often present data, I should point folks to the works of Edward Tufte a Yale Emeritus Professor who is renowned for his data visualization and information design (see http://www.edwardtufte.com/tufte/ -- he is giving one-day courses in Seattle on the 20th and 21st of June). He has written publications on some of the problems with PowerPoints. These URLs will show some of his data visualizations:

Second, one presentation left me (the old statistician) drooling for the software. It was presented by JoAnn Kuchera-Morin of AlloSphere. http://www.allosphere.ucsb.edu/.


The presentation totally awed the audience (and this was a tough audience – Tim O’Reilly [O’Reilly Media], P.Warrior [CTO, Cisco], Vogel [CEO,Amazon], JP Rangaswami [Chief Scientist, SalesForce] etc etc etc].


A variety of data (from nuclear physics to the mind ) was shown as:

  • Three-D fly through changing with time [4 dimensions]
  • Surfaces were color coded by other values [5 dimensions]
  • Based on your location, still more data was heard as sound (data transform by Fournier into the audio range) – [6 dimensions]

I would strongly urge you to view some of results at http://www.allosphere.ucsb.edu/media.php

The item that jumped into my mind was “This would be a sweet way to do SQL Server performance analysis!”. Often analysis is currently done as 2D-charts via Excel. Microsoft has the technology to improve this greatly (and has had it since 1996) – my wife was a co-author on an Introduction Book to Active X and wrote the chapter on the what became DirectX). If someone is looking for a start up idea – look at commercializing their research for specific market segments.


There are better ways to present data then with an Excel X-Y plot

Wednesday, June 1, 2011

Create a User Work Area Database on SQL Server

Long ago, in a past millennium (literally), I was working for Microsoft Licensing and we needed to create a User Work Area where power users can create their own tables, stored procedures, etc. A colleague from those days asked me for a modern equivalency. I like this idea because it amounts to crowd-sourcing of data. People own their data and can share it with whoever they wish easily from a massive repository. Of course, IT Micro-Managers may not be too happy because it may threaten some of their position-justification. I like the concept because it can make a firm more agile with better sharing of data, power users leveraging power user.


No more politics, let us get to the proposed pattern and then the code.

  • The idea is to create a SCHEMA for each person and then grant him all of the permissions for his SCHEMA.
    • He thus has his sandbox…
    • The person (super user in terms of skills) can thus grant permission to other users to access his SCHEMA – sharing.
  • If the Schema is the same as their domain name (value of SYSTEM_USER), one level of indirection is eliminated resulting in a better user experience.
  • With Windows Authentication, SYSTEM_USER is the Microsoft/KenL and User may be ‘dbo’ or ‘guest’

This means that we need to create USER for each SYSTEM_USER. We also need to create a matching SCHEMA and assign this as the default SCHEMA.


Pattern #1: User Create as Needed

  1. Set up users in bulk via [NT AUTHORITY\Authenticated Users]
  2. Users login and execute a procedure (the only thing that they can do) to create their schema and permissions.
    GRANT EXECUTE ON CreateMyWorkSpace TO [NT AUTHORITY\Authenticated Users] AS DBO
  3. They then execute it as the following actions occur:
    1. The Schema is created
    2. A login is created for the user (remember we are logged in via Authenticated Users)
    3. A User is created to match the Login with the above schema being the default
    4. The user is granted full privileges to the schema.

The code below is the conceptualization (code is not working yet)


CREATE PROC CreateMyWorkSpace
AS
DECLARE @Schema nvarchar(max)
DECLARE @CMD nvarchar(max)
IF NOT EXISTS (SELECT 1 FROM Sys.Schemas where name=SYSTEM_USER)
BEGIN
    SET @CMD='CREATE SCHEMA ['+SYSTEM_USER+'] AUTHORIZATION DBO'
    EXEC (@CMD) AS LOGIN='LAPTOPX4\ken.lassesen'
   

    SET @CMD='CREATE LOGIN ['+SYSTEM_USER+'] FROM WINDOWS WITH DEFAULT_DATABASE=[UserArea], DEFAULT_LANGUAGE=[us_english]'
    EXEC (@CMD) AS LOGIN='LAPTOPX4\ken.lassesen'


    SET @CMD='CREATE USER ['+SYSTEM_USER+ '] FOR LOGIN ['+SYSTEM_USER+'] WITH DEFAULT_SCHEMA = ['+SYSTEM_USER+']'
    EXEC (@CMD) AS LOGIN='LAPTOPX4\ken.lassesen'
   

    SET @CMD='GRANT CONTROL  ON SCHEMA :: ['+SYSTEM_USER+']  TO ['+SYSTEM_USER+'] WITH GRANT OPTION AS dbo'
    EXEC (@CMD) AS LOGIN='LAPTOPX4\ken.lassesen'
END
go

The advantage of this approach is that nothing is created until the user uses it.


Pattern #2: Pre-Create Users

In this case, a table (or XML) is read and all of the above actions occur. This may result in many schemas being created that will never be used.

The effective code is below:


CREATE SCHEMA [Laptopx4\oltpitgn] AUTHORIZATION DBO
CREATE LOGIN [Laptopx4\oltpitgn] FROM WINDOWS WITH DEFAULT_DATABASE=[UserArea], DEFAULT_LANGUAGE=[us_english]
CREATE USER [Laptopx4\oltpitgn] FOR LOGIN [Laptopx4\oltpitgn] WITH DEFAULT_SCHEMA = [Laptopx4\oltpitgn]
GRANT CONTROL  ON SCHEMA ::[Laptopx4\oltpitgn]  TO [Laptopx4\oltpitgn] WITH GRANT OPTION AS dbo

Bottom Line

There’s some debugging to do on Pattern #1. The effective code for Pattern #2 does work but with one critical oddity. I can Insert, update, delete, select an existing table in the Schema – but cannot create one.  Help is unclear on this aspect (http://msdn.microsoft.com/en-us/library/ms187940.aspx )… This needs further researching – stay tune…


One Work Around

The non-create behavior can be walked around by granting CREATE privileges (non-schema specific) and then adding a DDL trigger to abort any create except in the user schema. It is not as elegant as doing a schema specific GRANT for CREATE.